When it comes to Google Slides presentations, you have lots of options for creating PDF files or printing. If you’d like to learn more how to do these tasks keep on reading this tutorial.
Creating PDFs
If you’d like to use your presentation in Google Slides for making a PDF file then follow these steps:
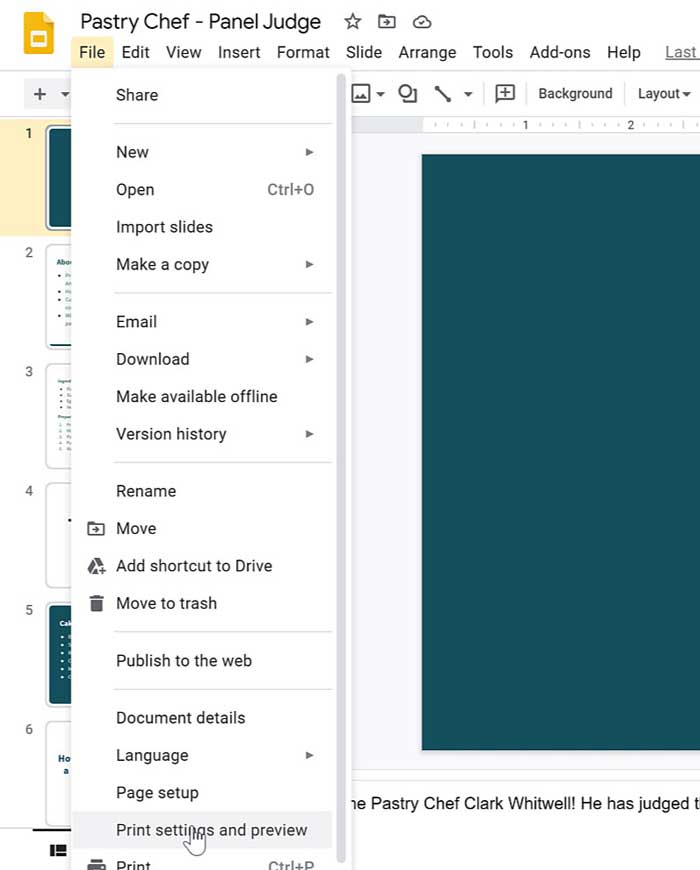
Click on the ‘Print’ button, after navigating to ‘Print settings and preview’ from File menu, so that the dialog box for print will show up on the screen.
The preview screen on the left side will show your selected options.
From the options displayed on the right side you could choose the first item which is ‘Destination’ and click on the drop-down menu in front of it. ‘Save to Google Drive’ or PDF or a printer choice are the options you have here.
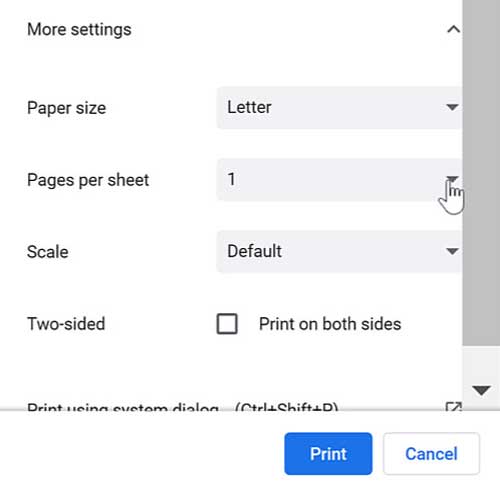
For more settings, such as paper size or scale you could open up the ‘More settings’ option below the main settings on the right. Most of the adjustments you set here could be applied to both PDF saving or printing.
Once you’re sure about the adjustments you made, you could click on the ‘Print’ option whether you chose PDF saving or a printer for output.
Please note that as an alternative method for making PDF out of your slides, you could click on ‘Download as PDF’ beside the ‘Print’ button on the toolbar.
After the PDF file is ready, you could find it on your system through download folder or wherever else you chose to download your file.
Printing handouts
Sometimes you just want to print handouts to give out to your audience before or after presentation. If that’s the case, you could make necessary modifications before making your slides ready for printing.
Here are some of the changes which you might consider:
Slides’ background
Sometimes, especially when you have a dark background in your slides, it’s better to hide it before printing the pages.
Just make sure that your text font isn’t too light so that without background it might turn unreadable.
To make the background disappear, just click on the ‘Hide background’ on the toolbar.
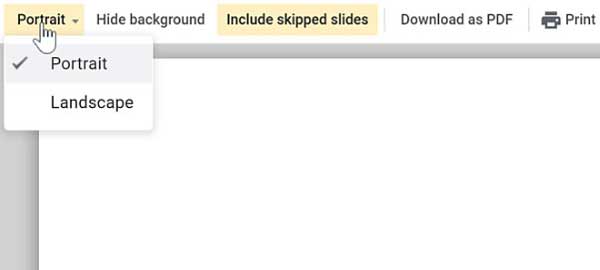
Page orientation
In order to have more legible slides, sometimes it could help if you change the page orientation. Just from the toolbar, you could select between these modes: Landscape or Portrait.
The trick is just trying both options to see which makes your slide better for printing.
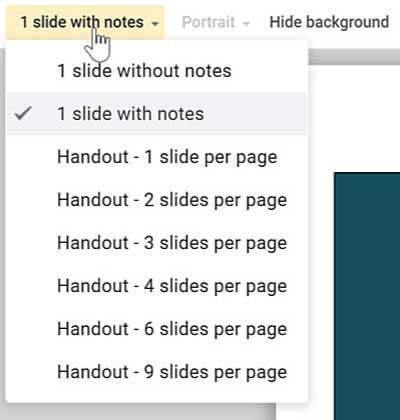
Number of slides per page
You could choose how many slides would be placed on each page and also, if that number is one, whether notes are included or not.
The default number is one slide per page. But depending on the usage, it could be 2, 3, or more pages as well.
For instance, for a lecture or training audience who might need to take notes, a 3-slide per page handout with a special column for note-taking might be more suitable.
Or if you want to give your audience just an overview of what you’re presenting and the actual readability is not that important, you could opt for the 9-slide option which makes your slides small enough to fit in a page.
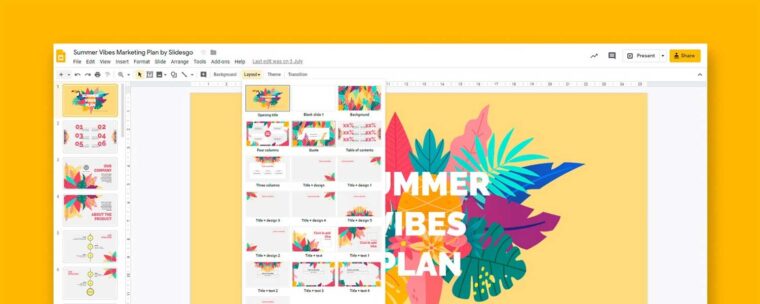
In case you want to explore more Google Slides templates for your current or future presentations, make sure to check out the mentioned resource to explore lots of different templates in a wide range of categories like infographics, medical, marketing, business, education, and more.


 between Android & iPhone")
")
