Google Nexus smartphones and tablets are among the most popular devices with Android systems. Here we discuss some helpful and simple methods to root Nexus 4, 5, 6, 7, 9 and Nexus 10 and other Nexus tablets and phones.
Why root Nexus phone or tablet?
Since early 2010, when the first Google Nexus phone released in the market, until now, there have been several different Nexus phones and tablets available.
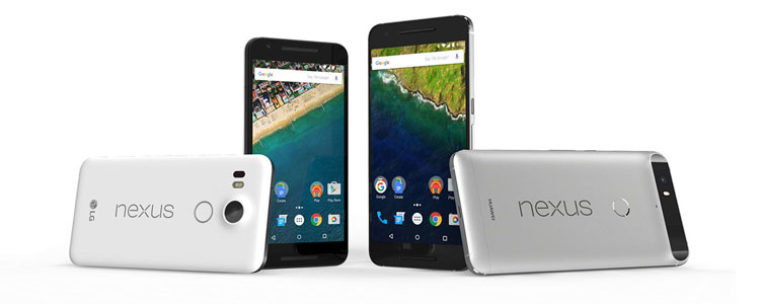
Galaxy Nexus, Nexus 4, Nexus 5 (and 5X) and Nexus 6 (and 6P) are Nexus phones, whereas Nexus 7, Nexus 9 and Nexus 10 are Nexus tablets developed by Google and manufactured by different well-known companies such as HTC, LG and Samsung.
There are several reasons why anyone would want to root their Nexus device.
Nexus phone or tablet’s processor overclock, installing and using apps with root access requirement (such as Nandroid backup or Titanium Backup), and installing custom ROM are among the main reasons to root an Android phone.
Here we discuss methods and tools which enable users to automatically root their Nexus phones and tablets.
Other ways, including manual rooting methods are available as well, which couldn’t be mentioned here.
‘dr.fone tookit’ – Android Root module
Wondershare dr.fone is a powerful suit of programs for Android devices with various features and options. These include data backup & restore, data extraction, data recovery, SIM unlock and so on.
One of the great features of dr.fone toolkit is its ability to root Nexus (and other Android phones and tablets) with just a few simple clicks.
Follow these steps to root the Google Nexus device with dr.fone application:
Step one – the first step is running the dr.fone Android toolkit from PC. Please note that the ‘Android Root’ module should be purchased first, if necessary (included in dr.fone Android Suite & compatible with Windows systems: Windows XP, Vista, 7, 8, and Windows 10).
Next, among all the toolkits shown on the screen, ‘Root’ should be selected and clicked on.
Step two – Now, using a USB cable, the Nexus phone or tablet should be connected to the computer. A pop-up message would be displayed on devices with Android 4.2.2 or higher versions (such as Galaxy Nexus or Nexus 4).
In order to let the rooting activities take place on the device, ‘OK’ should be selected on this message. After this, the Nexus tablet or smartphone will be identified and connected to the system automatically through Wondershare dr.fone toolkit.
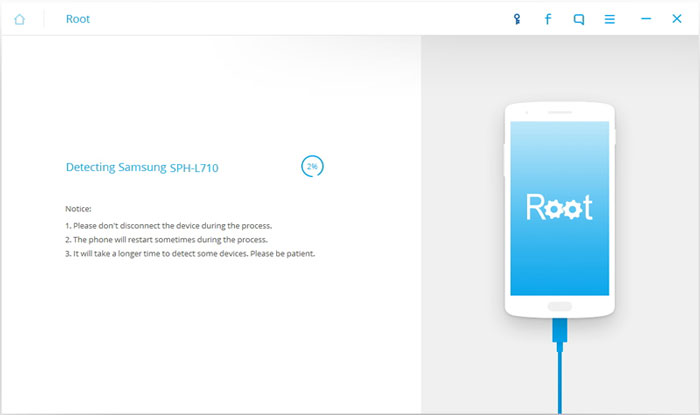
Step three – the ‘Start’ button on the screen should be clicked after the Google Nexus device is connected to the system. Then, the detection process will begin by the software in order to find the right root method for the Android device. Please note that depending on various phone/tablet models, a few minutes might pass before the process is completed.
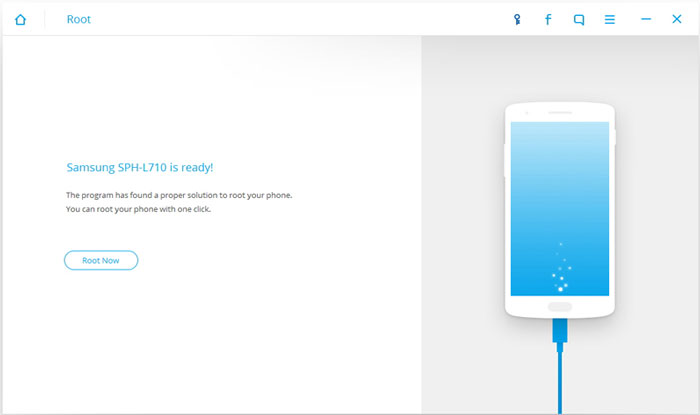
Step four – after finishing the detection process, a ‘Root Now’ button will be displayed on the screen. To begin rooting the Nexus smartphone or tablet, this button should be clicked. A separated confirmation for Nexus rooting is required on the device.
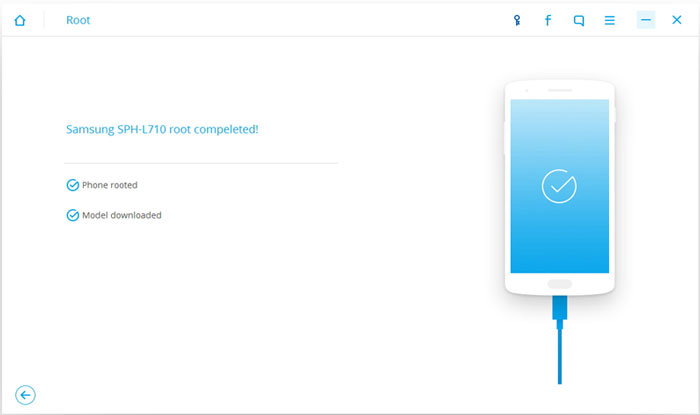
This would be done through displaying a pop-up message during the process of rooting, asking the user’s permission to go through the rooting. After that, the successfully rooted phone or tablet would be ready in just a few minutes.
After everything is done, a screen similar to the below will be displayed:
Other Nexus rooting programs
There are tens – if not hundreds – of various rooting toolkits and applications available on the Internet for rooting Android devices – including Google Nexus phones and tablets (such as Nexus 6 or 6P, Nexus 7, 9 and 10).
Here is a selection of these rooting tools:
SuperSU Pro – this is a root app which could be found and downloaded from Google Play Store. The main functionality of this app comes to help when any Android app requires root access on the device, which could be denied or granted through SuperSU Pro.
Other features of this app include: completely/temporarily unrooting Android tablet or phone, root access notifications, logging and prompting, and wake on prompt. Overall, SuperSU pro is a great app to help users root Nexus devices without computer.
Root Genius – Nexus rooting is made fast, easy and simple using Root Genius program which has been created in China.
This root software supports Android versions 2.2 up to 6, and flash custom ROM is enabled after the device is rooted. Over 10,000 Android tablets and smartphones are compatible with this application.
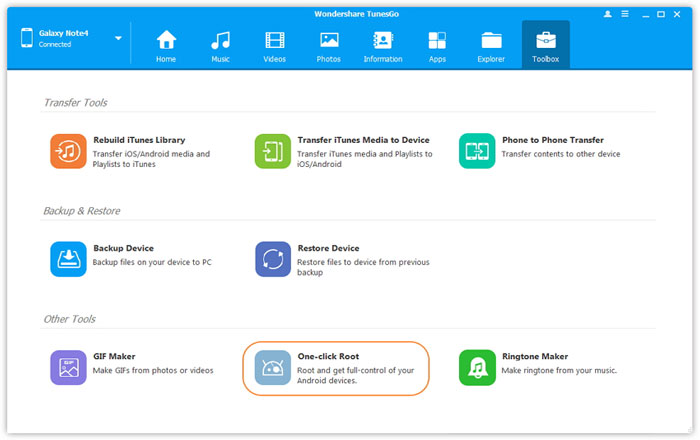
TunesGo Root Tool – TunesGo is another great tool by Wondershare with many helpful features. The root feature we desire here is performed very smoothly and easy with this software, and in just a few simple clicks.
Important data and files could be backed up or restored before or after rooting. More than 3,000 Android devices (including Google Nexus) with Android 2.1 or higher versions are supported by TunesGo.
Whatever Nexus root tool is used, it is highly recommended that a backup of all files and data on the device should be created before the process, in case any unwanted outcome happens.
 Galaxy Nexus, Nexus 4, Nexus 5 (and 5X) and Nexus 6 (and 6P) are Nexus phones, whereas Nexus 7, Nexus 9 and Nexus 10 are Nexus tablets developed by Google and manufactured by different well-known companies such as HTC, LG and Samsung.
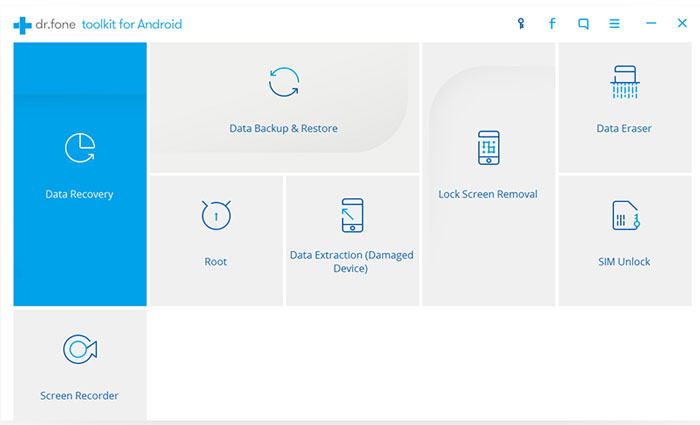


")
")
